Today, we’ll show you how to connect a Mi Band to your phone using the Zepp Life app. You will need to pair your Mi Band with an app so that you can enjoy using its many features.
Please note that you will need a phone that, at a minimum, has Android 6.0 or iOS 10 installed and you can’t pair your Mi Band 7 Pro and Mi Band 8 to your phone using Zepp Life: use Mi Fitness.
Step 1: Sign into Zepp Life
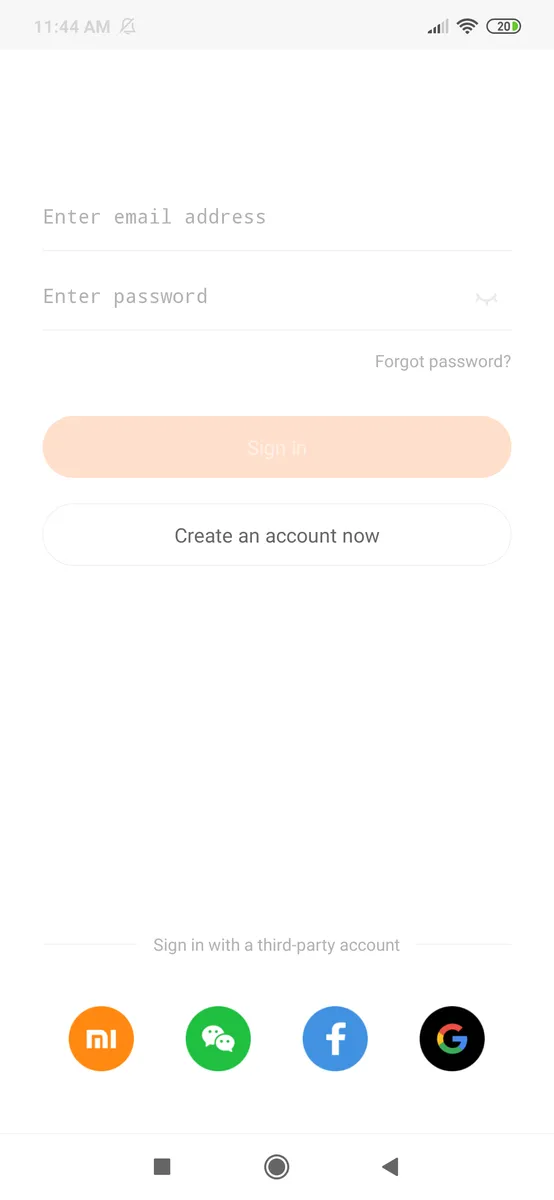
To pair your Mi Band with your phone using the Zepp Life app, you will need to first sign into the app. If you don’t have a Zepp Life account, please follow our handy step by step guide on how to create a Zepp Life Account.
Alternatively, you can also log into Zepp Life using a third-party account. Currently, Zepp Life supports Mi Fitness, WeChat, Facebook, and Google accounts – though sometimes they do not work!
Step 2: Turn on Bluetooth on your Phone
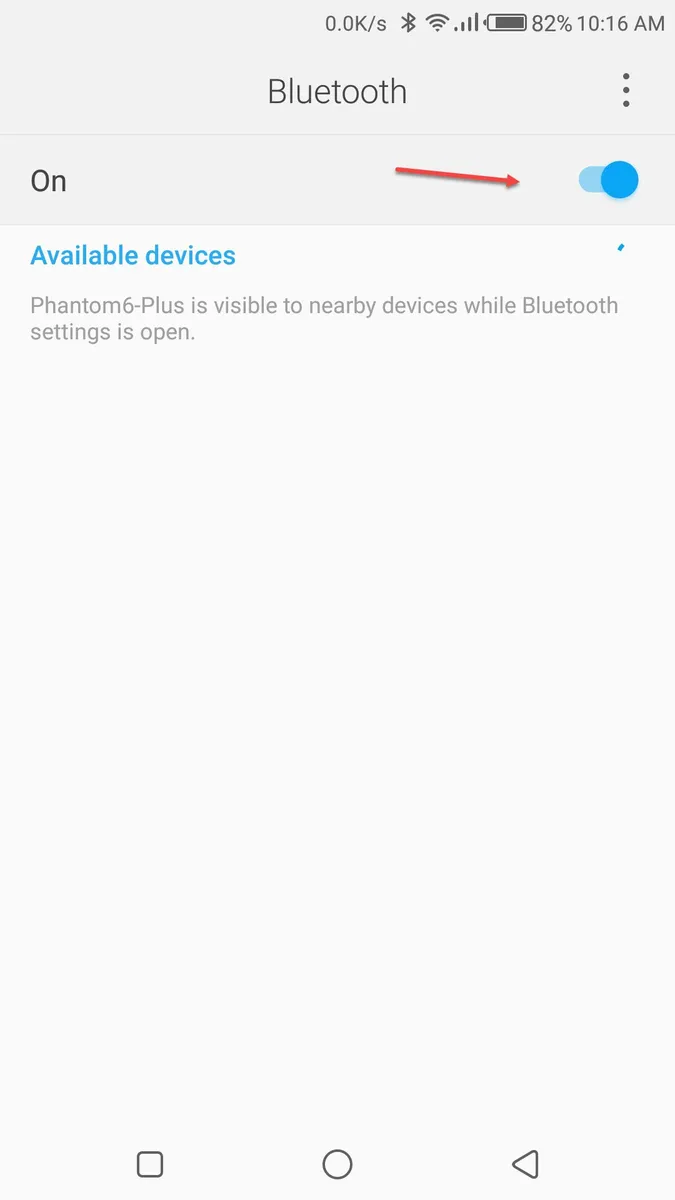
Next, you will need to turn on Bluetooth on your phone. Your Mi Band uses Bluetooth to communicate with your phone. If you want your band to always communicate with your phone, you will need to keep the Bluetooth visibility on your phone turned on. However, Bluetooth visibility of your Mi Band is always on.
Step 3: Search for Available Bluetooth Devices
Then, you will need to search for nearby Bluetooth devices by clicking on More Settings menu on your phone. You need to place your Mi Band very close to your phone so that your phone can detect it as an available device. If on the first try your phone can’t find your Mi Band, click on the 3 dots on the top right-hand corner for your Bluetooth settings screen and then click on refresh to again search for nearby Bluetooth devices.
Step 4: Pair Your Mi Band with your Phone
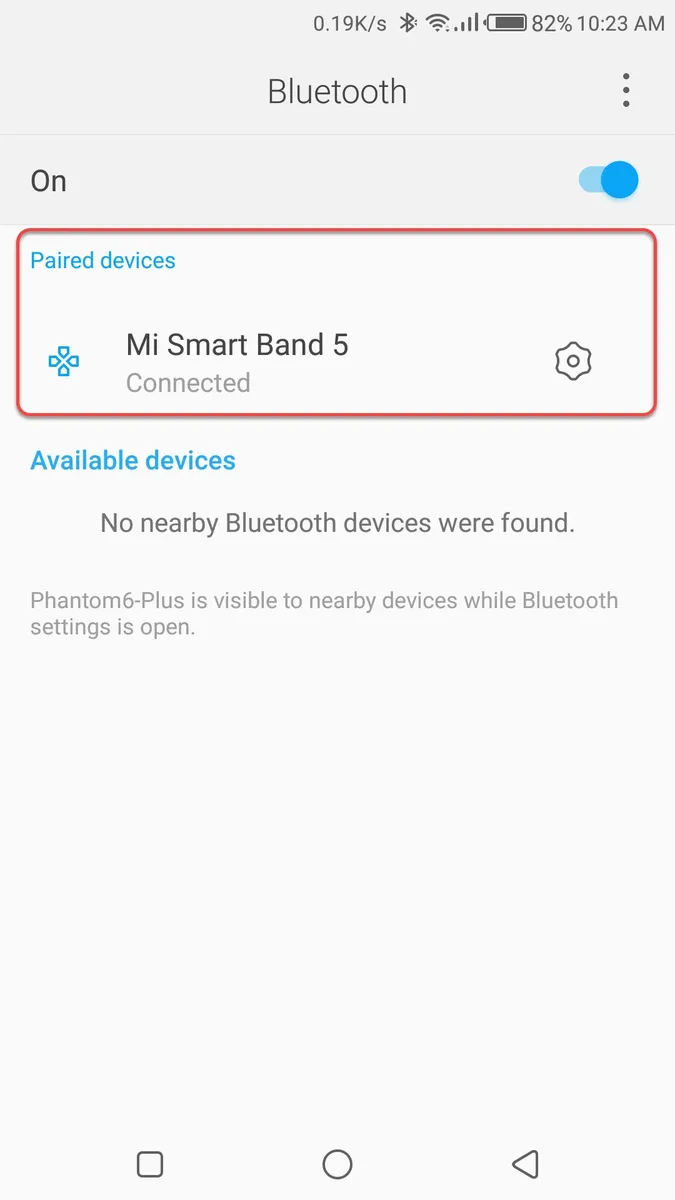
Once your phone’s Bluetooth has found your Mi Band device, click on your Mi Band device name to pair your band with your phone. Once the pairing process is complete, your Mi Band device will show up under Paired devices on your phone.
Step 5: Click on Profile
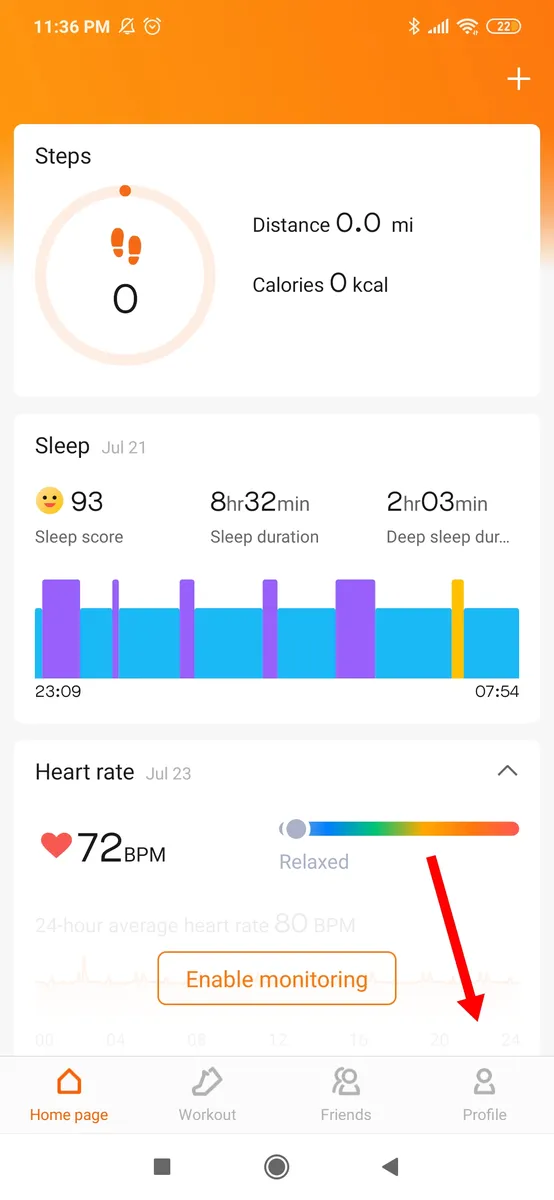
Now, head over to your Zepp Life app’s homepage and click on the profile icon, bottom right-hand corner.
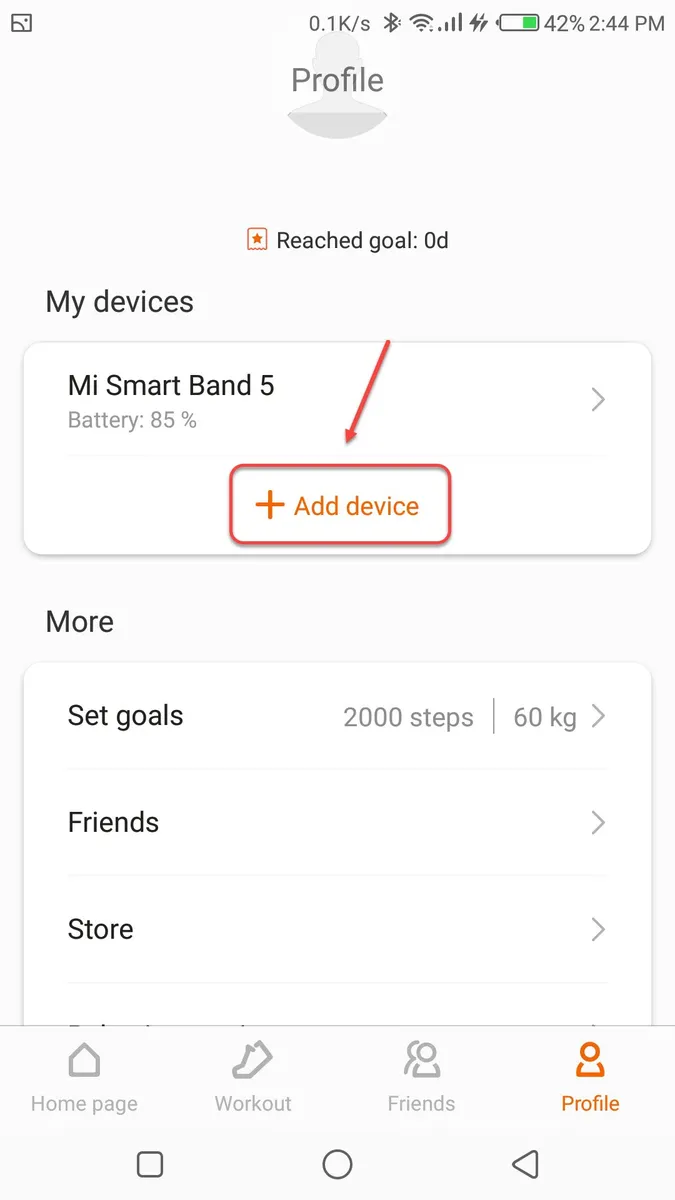
Step 6: Add Device
Step 7: Select Device to Pair
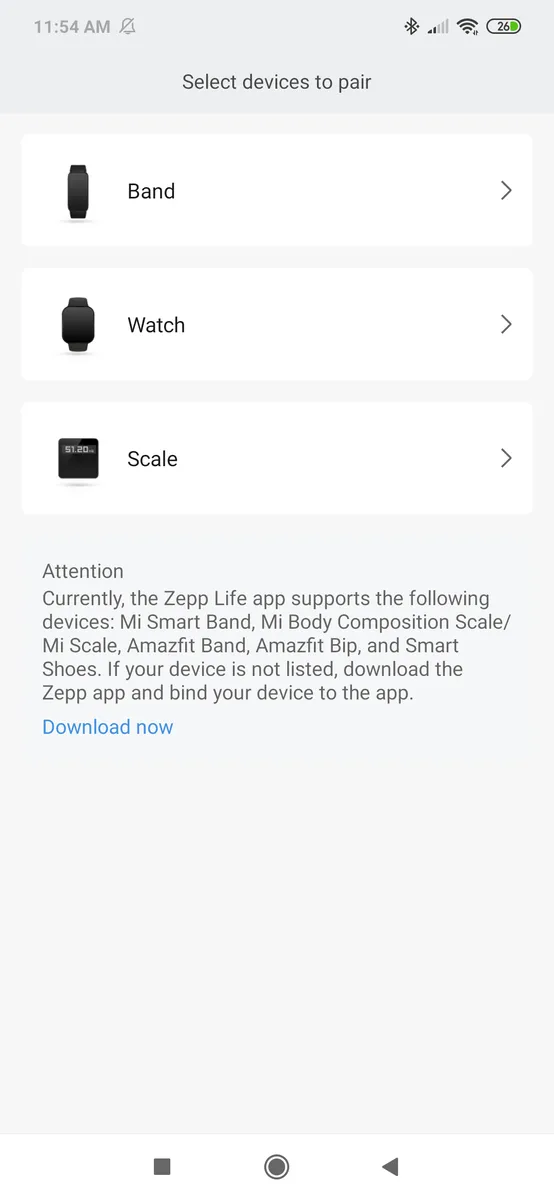
Next you will need to select the device that you want to pair with Zepp Life: your Mi Band. So, click on Band and a notice will appear informing you on how your data will be collected and processed. Click on Agree to accept.
Step 8: Allow Zepp Life to Access your Phone’s Camera
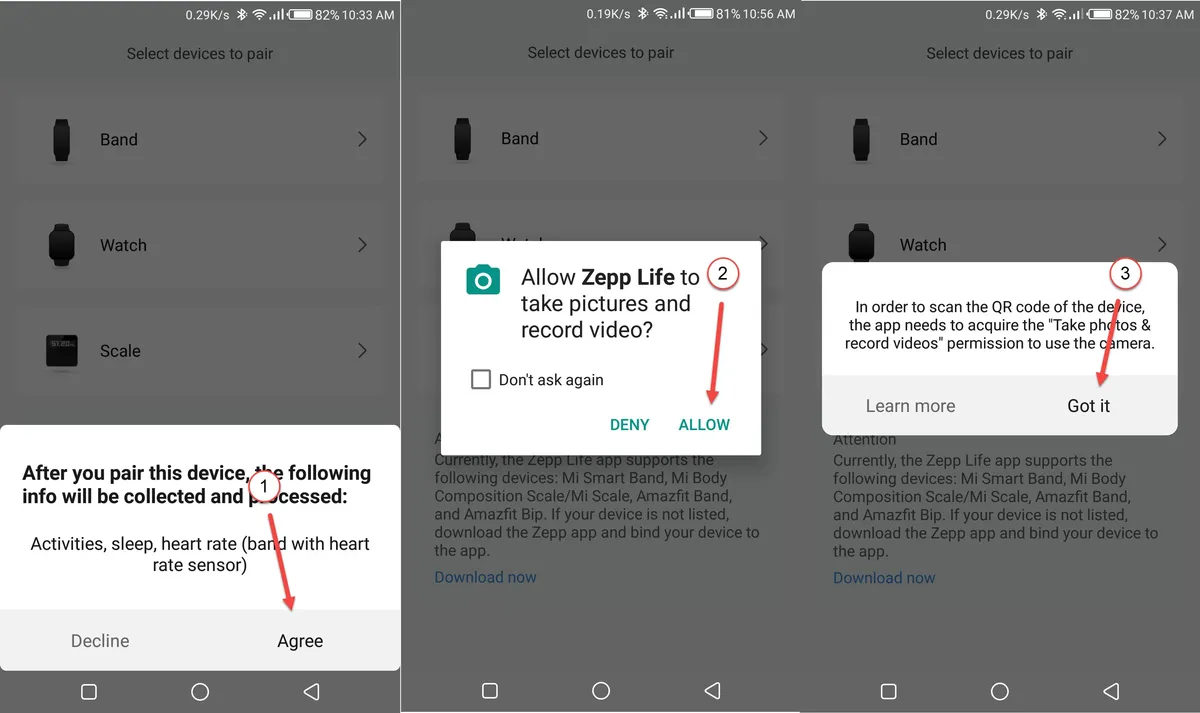
This next step is to give Zepp Life permissions to use your camera. This is because later Mi Bands models generate a paring/binding QR code. You can always revoke this permission once you have paired Mi Band with your phone. So, click on Got it, then Allow.
Step 9: Select Band Type
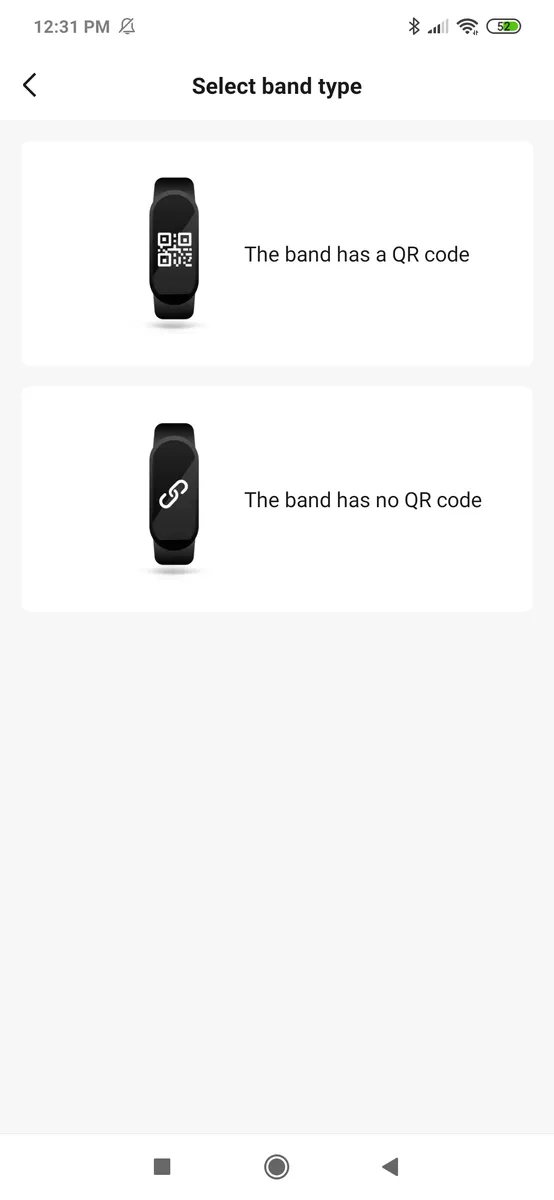
At present, only Mi Band 7 has the QR code binding feature. If you own a Mi Band 7, select your band has QR Code. For all other Mi Bands, click on the band has no QR code option.
If you are pairing a Mi Band 7 using the QR code, you’ll need to scan the QR code on your Mi Band using your phone (that’s why it is important to give Zepp Life permission to access your phone’s camera). If you selected the no QR code option, Zepp Life will begin searching for your Mi Band. Keep the band close to your phone.
Step 10: Accept Binding Request
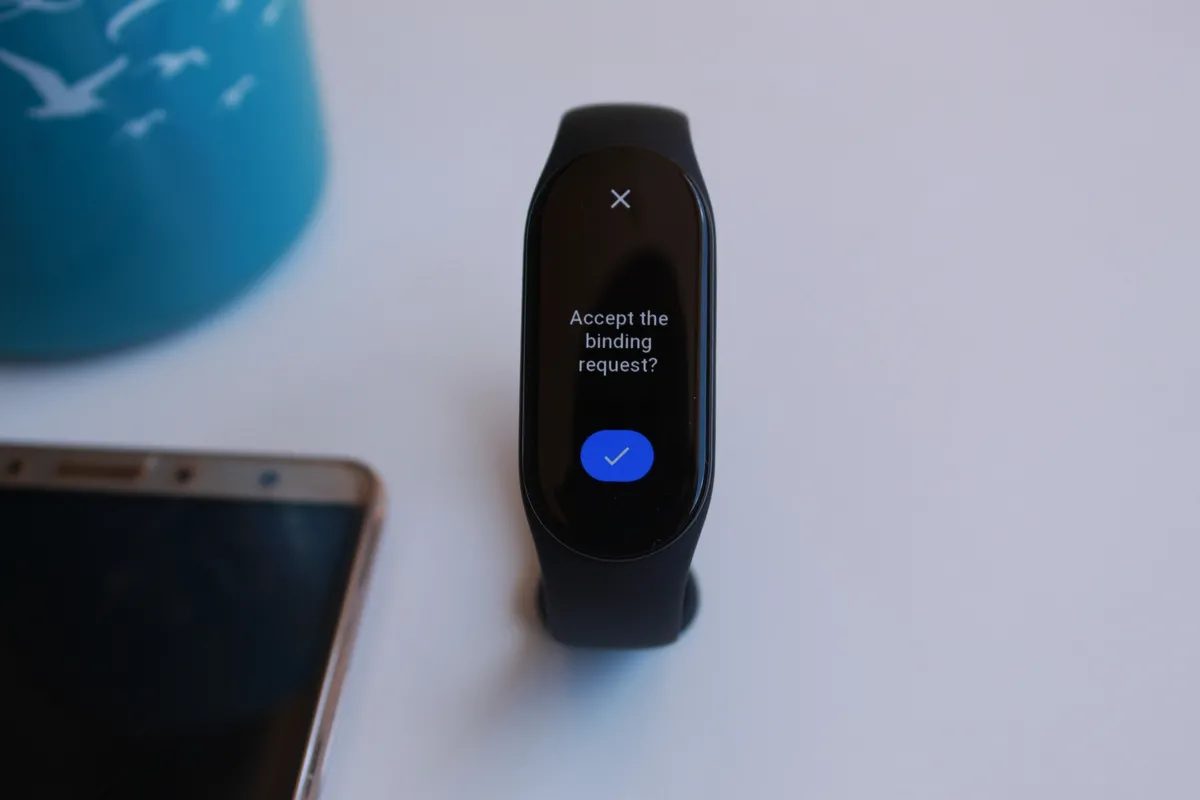
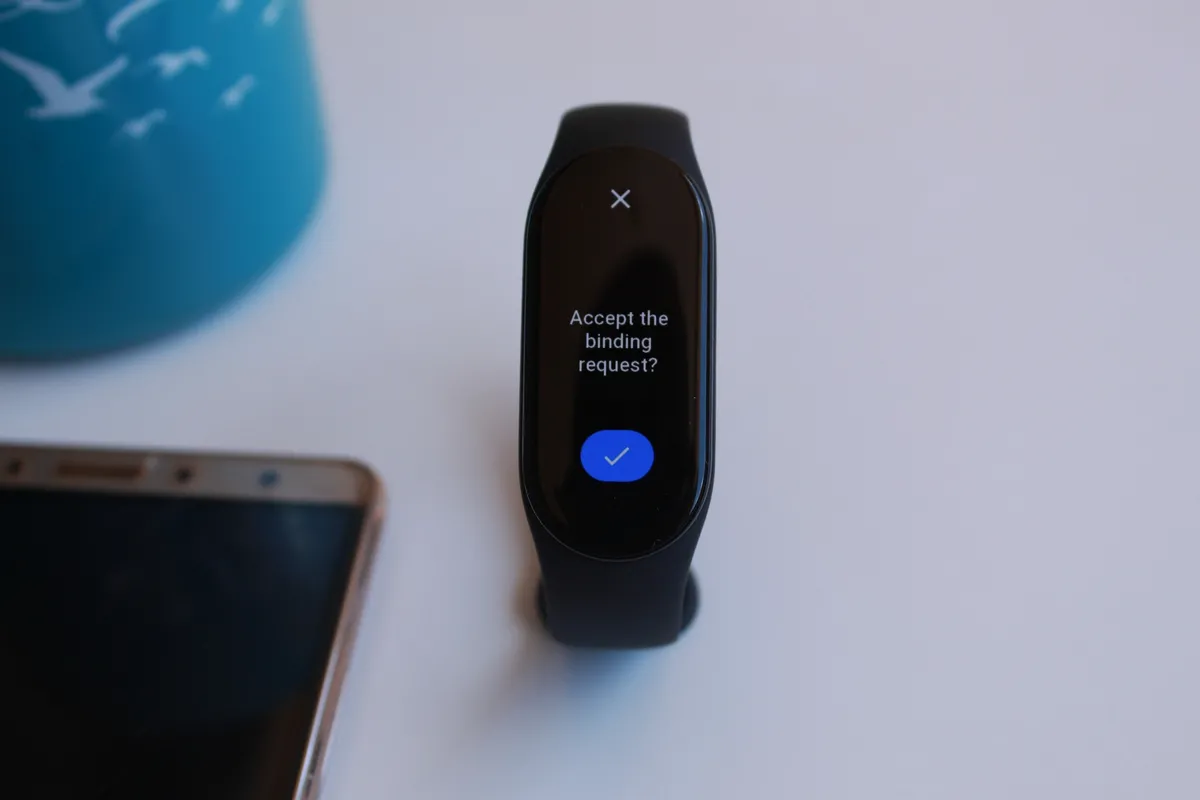
Once Zepp Life has found your Mi Band, it will attempt to connect to it. And your Mi Band will vibrate when it gets the connection request from Zepp Life. On your Mi Band, tap on the check mark to accept the binding request.
And that’s it. You have now paired your Mi Band with your phone using Zepp Life.
I had issues pairing my Mi Band 5 with Zepp life. I simply could not get it to pair! I tried pairing it with Mi Fitness App and it worked flawlessly. When I later tried to pair it with Zepp Life, after unpairing the band from Mi Fitness, it worked.
So, if you are having issues pairing your Mi Band 5 with Zepp Life, try first pairing it with Mi Fitness. I had no such issues pairing my Mi Band 6 or 7 with Zepp Life.
Hope you have found this post to be useful. If you have any questions, let me know in the comment section below.

Leave a Reply